[ * 필자 Unity 버전 == 2020.3.6f1 ]
https://docs.unity3d.com/Packages/com.unity.timeline@1.6/manual/index.html
About Timeline | Timeline | 1.6.1
About Timeline Unity's Timeline Use Unity's Timeline to create cinematic content, game-play sequences, audio sequences, and complex particle effects. Each cut-scene, cinematic, or game-play sequence that you create with Unity's Timeline consists of a Timel
docs.unity3d.com
Timeline doc
Timeline
- 인게임 컷신을 제작하거나 복합 애니메이션을 제작할 때 사용하기 좋음 (Playable Director에 의존)
Package Manager에서 Import!
Window - Sequencing - Timeline
timeline window를 열고 Timeline을 생성할 오브젝트를 클릭 후 Create
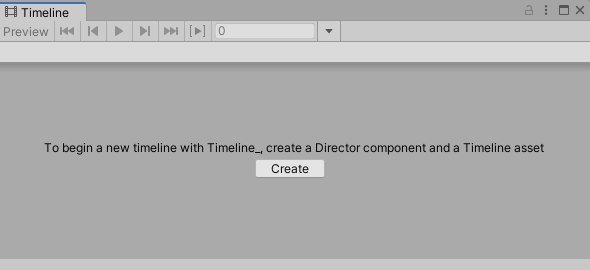

-> 오브젝트에 Playable Director component가 추가됨

Playable Director - timeline의 기본 설정
1. Playable - Play 할 Timeline asset(timeline을 create 할 때 생성한 .playable asset)을 선택
2. Update Method- DSP(Digital Signal Processing) : 정확한 오디오 샘플링 스케쥴링을 위해 사용- GameTime : 게임 시간과 동일하게 (Time.timeScale 영향 받음)- Unscaled Game Time : 게임 시간과 동일하게 (But Time.timeScale 영향 안 받음)- Manual : 스크립트를 통해 시간을 수동으로 설정[나중에 Custom Playable을 만들 때 혹은 Control Track 사용 시 사용하기 좋음 특수한 경우를 제외하곤 GameTime으로 많이 사용할 듯]3. Wrap Mode- Hold : timeline이 재생되고 중단될 때까지 마지막 프레임에서 대기- Loop : 재생이 중단될 때까지 반복 재생- None : 한번 재생이 끝나면 초기화[ * 10초짜리 타임라인이라고 가정했을 때 None의 경우 끝나면 0초로 돌아가고 Hold의 경우 10초에서 멈춰있는거]4. Initial Time - 지정한 시간부터 재생 [10초짜린데 3으로 했음 3초부터 재생]

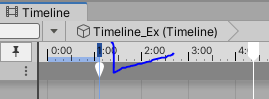
1. timeline을 작업할 때 특히 여러 개의 timeline을 다룰 때 작업하다 엉키기 싫으면 현재 작업 중인 timeline을 꼭 lock 하고 작업하는 것을 추천한다.
[lock을 한 상태에서 timeline을 끄고 원래 상태를 잠시 볼 때는 2(Preview)를 해제하고 보는 게 속 편한 느낌]
3. 여러 종류(Binding)의 Track을 추가할 수 있다.
(기본트랙 말고 Custom Playable을 통해 custom Track을 추가할 수 있다)
4. Markers를 보여주냐 마냐인데 생각보다 한 번씩은 꼭 쓰니까 걍 켜뒀
5. timeline의 설정을 할 수 있는데 타임라인의 기본 설정이 Frames으로 보여주게 되어있는데 Seconds로 보는 게 심적으로 편해진다.
6. 재생 바인데 얘를 와따리 가따리 해서 그 시간대의 상태를 test

1. 통 째 로 Track이라 함
2. Track에서 컨트롤할 Binding - 별게 다 들어갈 수 있음 (애니메이터, 시네머신 오디오 소스, 드으드으드ㅡ으등)
3. Cilp - Track안에 Clip이 있고 Clip은 하나의 액션이라 생각하면 됨 (당연히 여러 개 둘 수 있음)

4. Blend - 이게 진짜 타임라인의 강력한 기능 - 클립을 블랜딩 하여 사용 가능(보간!!!)
* Track이 많아져서 지저분해지면 Track Group을 추가해서 그룹별로 관리도 가능

간단히 몇 개의 Track을 사용해보면
Active Track은 저 구간에 active를 활성화하는 거고
Animation Track은 오브젝트에 Ani를 줄 수 있는데 Track 옆에 보이는 녹화버튼을 통해 녹화할 수 있고 녹화 시 값을 변경하면 keyFrame이 생기는데 이는 추후에 당연히 바꿀 수 있음(더블클릭하면 그 애니메이션으로 이동)
그 외 audio 등 여러 가지 Track을 추가하고 쉽게 사용 가능하다.
* Control Track의 경우도 쉽다 보면 어떻게 사용해야 할지 눈에 확 보이고
https://qiita.com/jukey17/items/4bebdb65b188103f0ef7
[Unity][Timeline] ControlTrackを扱う上で注意すること - Qiita
初めに ControlTrackはシーン上のObjectを操作したり、Prefabの生成を制御したりすることができる標準のトラックです 今回はこのControlTrackにはどのような機能があるのか、そしてそれらの機能は
qiita.com
요 글을 참고해도 좋을 것이다.
여기까진 쉽고 이제부터 좀 자세히 알면(?) 사실 알아야 하는 좋은 내용들
Marker : 클립과 달리 timeline에서 어느 한 지점을 표시 (코딩해서 커스텀으로 제작해야 함)
이런 식으로 불러서 사용하는데 코드를
using UnityEngine;
using UnityEngine.Playables;
using UnityEngine.Timeline;

public class Test_Marker : Marker, INotification
{
    public GameObject testObject;

    //public PropertyName id => throw new System.NotImplementedException();
    public PropertyName id { get { return new PropertyName(); } }
}
using UnityEngine;
using UnityEngine.Playables;
public class Test_PlayerBridge : MonoBehaviour, INotificationReceiver
{
public GameObject youwant;
public void OnNotify(Playable origin, INotification notification, object context)
{
Test_Marker TM = notification as Test_Marker;
//TM.testObject
//youwant.으로 ~
//throw new System.NotImplementedException();
}
}이런 식으로 2개 작성하고 사용해야 함
* Test_Marker의 testObject가 마커에서 바인딩할 수 있고 그걸 Test_PlayerBridge에서 사용하는데 자유롭게 코딩해서 사용 가능 -> Test_Marker TM = notification as Test_Marker; 이런 식으로 TM의 정보를 가져와서 사용하면 됨
근데 사실 마커는 이렇게도 사용할 수 있는 거고 사용 방식이 너무 다양함 이 글 가장 아래 부분에 Marker 관련 영상이 있는데 참고하면 좋고
https://blog.unity.com/kr/technology/how-to-create-custom-timeline-markers
커스텀 타임라인 마커 만들기 | Unity Blog
마커는 타임라인 에셋에 추가할 수 있는 새로운 항목으로 특정 시점을 표시할 때 사용됩니다. 또한 마커는 활성화 클립, 오디오 클립, 애니메이션 클립 등의 클립과 마찬가지로 특수 기능이 있
blog.unity.com
요것도 참고하길 바람
Signal Track (사용자 지정 유형의 마커를 통해 기능을 요구할 때)
- Event Trigger랑 비슷한 느낌이다. Signal Emitter 특정 구간에 생성 후 메소드를 호출할 수 있다.
위 경우 Player를 Binding 하고(Player에 Signal Receiver가 추가됨)
Signal Emitter을 만들고 Signal을 만들쟈
이렇게 하면 새로 만든 Test 시그널에 Reactioni을 추가하여 사용할 수 있다.
* Signal Receiver는 Player였고 Test시그널을 추가했기 때문에 Test시그널을 수정하면 Player에 있는 Signal Receiver에 자동으로 적용된다.
Unity Events처럼 Signal Receiver가 하나 있고 저 안에 다른 에셋들을 넣어서도 사용 가능 꼭 Signal Receiver를 Player에 만들었다 해서 Player에서만 부를 수 있는 게 아니고 다 부를 수 있음
이제 마지막으로 Custom Playable을 알아보자
[커스텀으로 기능을 제작하여 사용할 수 있는 엄청난 기능이라구!]
Timeline에서 정말 강력한 기능이고 처음 사용하기에 굉장히 괴상하고 요상하지만
코드를 잘 작성한다면 더할 나위 없이 편하고 좋은 기능이다.
먼저 공부하면서 만든..? 음.. 진짜 ㅋㅋㅋ 미적 감각도 없고 기능 구현을 해보고자 만든 타임라인을 보자

첫 부분에 light의 색이 바뀌고 light의 rotation을 조금 이상하게 변경하는 부분, text를 띄우는 부분은 custom으로 제작한 부분이다.
[Cinechane과 함께 사용하니까 참 좋다..]
먼저 우리들의 엄청난 수고를 덜어줄
https://assetstore.unity.com/packages/essentials/default-playables-95266
Default Playables | Unity 필수에셋 | Unity Asset Store
Get the Default Playables package from Unity Technologies and speed up your game development process. Find this & other Unity 필수에셋 options on the Unity Asset Store.
assetstore.unity.com
을 다운받도록 하자
Custom Playable을 제작할 때는 한 Track을 위해 4개의 script가 필요하다.
근데 이를 몇몇 설정을 통해 자동으로 생성해주는 귀한 asset이다.

asset을 받고 나면 이렇게 다양한 예제들을 제공해준다. 그리고 PDF는 여러 자세한 설명들이 있으니 꼭 정독하길
- 예제를 사용해가면서 익히는 것도 좋다.
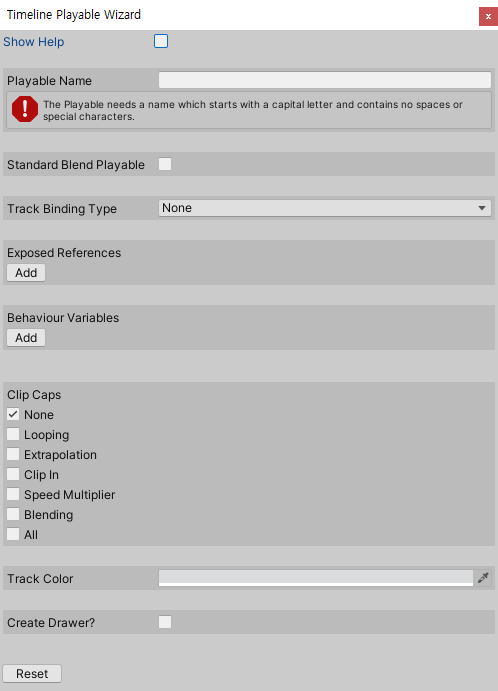
window - Timeline Playable Wizard를 통해 위와 같은 화면이 뜨고 설정을 통해 4개의 script를 자동으로 생성해준다.
* show help 클릭하면 각 부분에 대한 세세한 설명을 해주고 Playable Name, Standard Blend Playable처럼 설정해야 하는 부분에도 마우스를 올리면 자세한 설명을 해준다.
Exposed References, Behaviour Variables는 변수를 미리 만들 수 있게 도와주는 것인데 사실 안 만들어놔도 된다.
[처음엔 이게 좋은데 나중 가니까 그냥 직접 필요할 때 코드 짜는 게 좋더라는...]
Clip Caps의 경우 작동 방식을 변경하는 데에 사용하는데 본인은 그냥 All로 두고 사용했다 ㅋㅋ
어쨌든 Create 하면

이런 식으로 4개의 스크립트가 생성된다.
- Track : 트랙과 바인딩을 정의 - 트랙의 색과 바인딩될 타입을 정한다.
- Clip : 클립에 포함된 데이터와 클립의 논리를 정의 Behaviour와 같이 동작
* 위에서 봤던 Exposed References가 여기에 정의되고 Resolve()를 통해 사용한다.
- Behaviour : Behaviour Variables가 여기에 정의된다.
- MixerBehaviour - 클립에서 작동되야하는 기능적인 것들을 대부분 여기에 코딩한다.
직접 제작한 것을 토대로 보면
일단 Default Playables를 다운로드하고 나면 보이겠지만

이런 식으로 아래 부분에 커스텀으로 제작한 Track들이 보이게 될 것이다.

그리고 clip을 위처럼 커스텀으로 제작한 clip을 넣어주면 된다.

clip을 눌러 inspector window에서 보면
아래 Template부분에 Behaviour Variables이 보일 것
이제 코드를 보면
Track
using UnityEngine;
using UnityEngine.Playables;
using UnityEngine.Timeline;

[TrackColor(0.1098039f, 0.1098039f, 0.1098039f)] //track의 색상
[TrackClipType(typeof(LightTransformClip))] //사용될 cilp script설정 (자동으로 코딩됨)
[TrackBindingType(typeof(Transform))] //바인딩 타입
public class LightTransformTrack : TrackAsset
{
    public override Playable CreateTrackMixer(PlayableGraph graph, GameObject go, int inputCount)
    {
        return ScriptPlayable<LightTransformMixerBehaviour>.Create (graph, inputCount);
    }

    public override void GatherProperties(PlayableDirector director, IPropertyCollector driver)
    {
        base.GatherProperties(director, driver);
    }
}
아마 여기 부분은 다 자동으로 생성됐을 것이다.
Clip
using System;
using UnityEngine;
using UnityEngine.Playables;
using UnityEngine.Timeline;

[Serializable]
public class LightTransformClip : PlayableAsset, ITimelineClipAsset
{
	//LightTransformBehaviour의 변수(Behaviour Variables)들 Inspector에 보여주기 위해
    public LightTransformBehaviour template = new LightTransformBehaviour ();

    //Exposed References에서 정의한건데 하다보니까 안쓰게됨..
    //public ExposedReference<Transform> startTransform;

    //꼭 Exposed References말고 그냥 이렇게도 자유롭게 선언 가능
    //public Quaternion endrotation;

    public ClipCaps clipCaps
    {
        get { return ClipCaps.All; }
    }

    public override Playable CreatePlayable (PlayableGraph graph, GameObject owner)
    {
    	//이 부분이 Resolve()을 통해 Exposed References를 Behaviour Variables로
        //넘겨주기 위함이다. 안쓰게되서 주석처리 했으나 참고용으로
        var playable = ScriptPlayable<LightTransformBehaviour>.Create (graph, template);
        LightTransformBehaviour clone = playable.GetBehaviour ();
        //clone.StartTransform = startTransform.Resolve (graph.GetResolver ());
        //clone.EndRotation = endrotation;
        return playable;
    }
}
Behaviour
using System;
using UnityEngine;
using UnityEngine.Playables;

[Serializable]
public class LightTransformBehaviour : PlayableBehaviour
{
    public Vector3 EndRotation; //Behaviour Variables

    //public Quaternion startingRotation;
    //public Quaternion endingRotation;

    public override void PrepareFrame(Playable playable, FrameData info)
    {
        //endingRotation = EndRotation;
    }
}
Behaviour Variables를 정의하는데 음 뭐랄까 어쩌다 보니까 뭐 주석처리를 많이 했는데 일단 이렇게도 쓸 수 있다 이 정도이고 EndRotation의 경우 다음에 볼 스크립트에서 불러서 사용 가능하니까 Behaviour에서는 변수를 선언한다 이 정도만 알고 넘어가도 될 듯싶다
MixerBehaviour
using System;
using UnityEngine;
using UnityEngine.Playables;

public class LightTransformMixerBehaviour : PlayableBehaviour
{
    Quaternion m_rotation; //원래의 값을 저장하기 위함
    Transform trackBinding; //ProcessFrame() 밖에서도 사용하기 위해

    bool m_FirstFrameHappened; //첫 한번만 원래의 값을 받아오기 위해

    // NOTE: This function is called at runtime and edit time.  Keep that in mind when setting the values of properties.
    //이건 디폴트로 생성되는 메소드인데 editor을 실행하지 않고도 재생바를 움직여 확인 가능
    public override void ProcessFrame(Playable playable, FrameData info, object playerData)
    {
        trackBinding = playerData as Transform; //이렇게 binding한 정보를 받아옴

        if (!trackBinding)
            return;

        if (!m_FirstFrameHappened) m_rotation = trackBinding.rotation;

        // 트랙에 존재하는 클립의 개수
        int inputCount = playable.GetInputCount ();

        Quaternion end = trackBinding.rotation;

        for (int i = 0; i < inputCount; i++)
        {
            //LightTransformBehaviour에서 설정한 값들을 불러오기
            ScriptPlayable<LightTransformBehaviour> inputPlayable = (ScriptPlayable<LightTransformBehaviour>)playable.GetInput(i);
            LightTransformBehaviour input = inputPlayable.GetBehaviour();

            // Use the above variables to process each frame of this playable.

            // 클립의 blending에 비례하여 계산하는 트랙 점유율(0~1)
            float inputWeight = playable.GetInputWeight(i);

            if (inputWeight >= 1) end = Quaternion.Euler(input.EndRotation);
        }
        trackBinding.rotation = Quaternion.Lerp(trackBinding.rotation, end, 0.1f);

        m_FirstFrameHappened = true;
    }

    public override void OnPlayableDestroy(Playable playable)
    {
        m_FirstFrameHappened = false;

        if (trackBinding == null) return;

        trackBinding.rotation = m_rotation;
    }
}
멀쩡한 코드는 아니지만 하튼 클립에서 동작하는 코드를 이 부분에 작성한다.
아 여기서 GetInputWeight 이 부분은

이런 느낌인데
Clip의 Ease In Duration, Ease Out Duration을 조절해서 값이 바뀌는 걸 볼 수 있음
일단 커스텀으로 제작하면서 느낀 건 (뭐 개판이긴 하지만) F12를 매우 많이 애용했으면 한다.
Timeline Playable Wizard로 기본 스크립트를 다 만들고 나서 상속받은 클래스나 인터페이스의 내용을 보고 메서드를 적절히 사용하는 게 참 중요하다.
그리고 가보니까 상속받은 것들의 설명도 주석 처리가 매우 잘 돼있다.
-----여러 타임라인 자료들-----
간단한 소개_0
https://blog.naver.com/eodud1410?Redirect=Update&logNo=222411991454
https://blog.naver.com/PostUpdateForm.naver?blogId=eodud1410&Redirect=Update&logNo=222411991454&redirect=Update&widgetTypeCall=true
blog.naver.com
간단한 소개_1
https://blog.devgenius.io/introduction-to-timeline-in-unity-6e8ed2148de4
Introduction to Timeline in Unity
Create cinematic content, game-play sequences, audio sequences, and complex particle effects.
blog.devgenius.io
간단한 소개_2
https://sleepingdaemon.medium.com/unity3d-intro-to-timeline-4ac9f6984f4b
Unity3D: Intro to Timeline!
What is Timeline, and what can it do? Today is your lucky day! Come on in, please! Have a seat.
sleepingdaemon.medium.com
간단한 소개 + 사용_1
https://www.youtube.com/watch?v=o8kh49Pjo2Y&t=3046s
간단한 소개 + 사용_2
https://www.youtube.com/watch?v=XHUaeCkaUy0
조금은 진득한 소개 + 사용 예시들 보여줌 (이건 다 보는 게 좋음, Marker 내용이 좋았음)
https://www.youtube.com/watch?v=gsEe0_o_934&t=1596s
Timeline과 같이 사용하는
https://www.youtube.com/watch?v=Psgwn0umwSc
Custom Playable 기본 설명
https://www.youtube.com/watch?v=uBPRfcox5hE
Custom Playable 사용 예제
https://www.youtube.com/watch?v=12bfRIvqLW4
Custom Playable 사용 예제
https://www.youtube.com/watch?v=LSrcQJHDUT4&t=399s
-----이상!-----
'Unity > 개념 및 분석' 카테고리의 다른 글
| Unity ScriptableObject 간단 정리 (0) | 2021.07.12 |
|---|---|
| Visual Effect Graph( -> Create VFX) 간단한 개념 (1) | 2021.07.06 |
| Unity Cinemachine [코딩 없는 카메라 연출] (0) | 2021.06.30 |
| Unity JSON 기본 개념 + 사용[JsonUtility + JSON .NET For Unity(newtonsoft.json) + LitJson + MiniJson] 아는 거 다 써버려 (0) | 2021.06.25 |
| Unity FlowCanvas(in paradoxnotion) Visual Scripting (0) | 2021.06.16 |